本篇大綱#
因為我們還沒跟 Persistent Volume 串接起來,要透過 OpenStack 提供的 Cinder CSI Plugin 讓 K8s 可以動態建立 PV。
內文#
Cinder CSI Plugin 是 K8s 對於 OpenStack 所寫的擴充套件,可以用來動態建立 PV,讓 PVC 可以自動 Mount 上去。
接下來就一步一步完成。
建立 OpenStack Application Credentials#
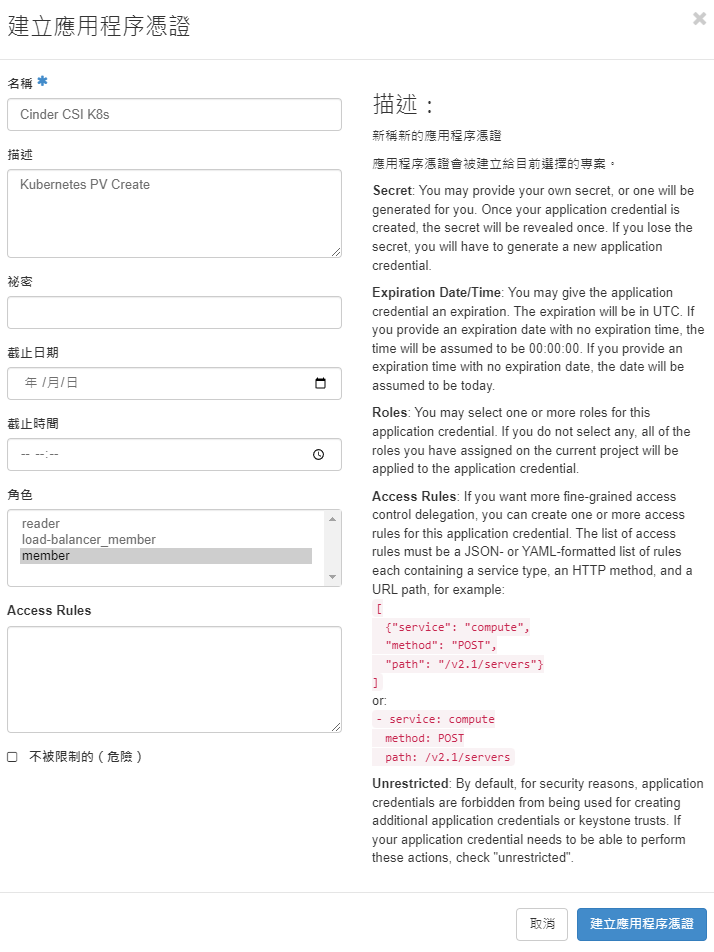
這裡就仿照 Day 20 所寫的 Application Credentials 去建立,名稱就寫 Cinder CSI K8s,角色就選擇 member。
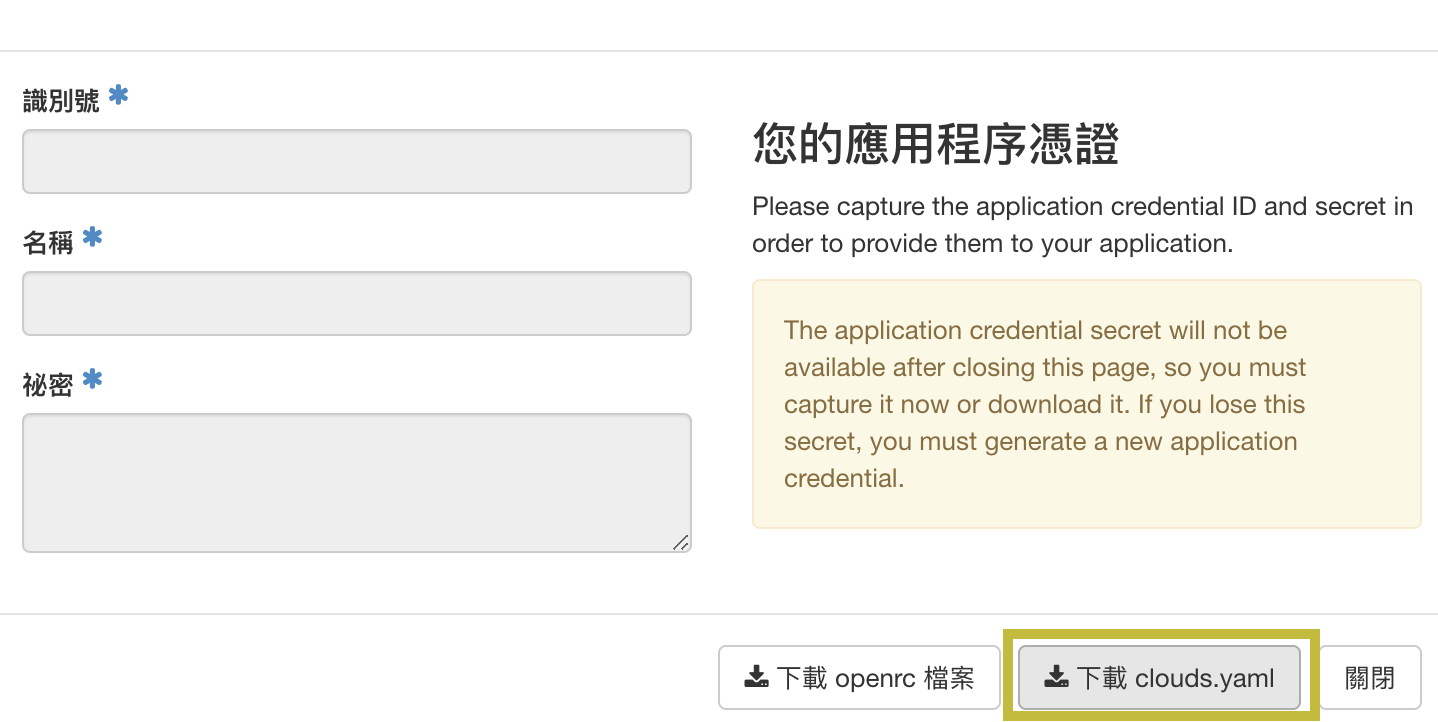
建立完成以後,就點擊 下載 clouds.yaml,等一下會使用到裡面的內容。
加入 Repo#
這裡我們先來把 Kubernetes 官方提供的 OpenStack 相關套件 Repo 加入進去:
helm repo add cpo https://kubernetes.github.io/cloud-provider-openstack
helm repo update
然後把 cpo/openstack-cinder-csi 的 Values 預設內容變成檔案:
helm show values cpo/openstack-cinder-csi > values.yaml # 把 openstack-cinder-csi Chart 的預設值變成檔案接下來就來把參數編輯上去
vim values.yaml基本上上面的內容不需要做任何變動,往 .secret 欄位看
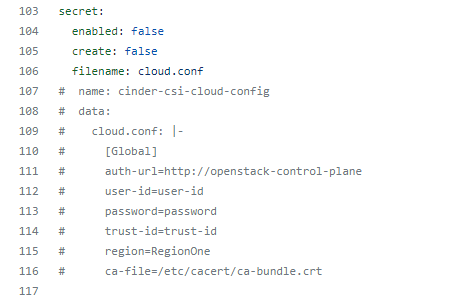
這裡可以填寫下載的 clouds.yaml 內容,可以照下面的參考網址做參數對應:https://github.com/kubernetes/cloud-provider-openstack/blob/master/docs/openstack-cloud-controller-manager/using-openstack-cloud-controller-manager.md#global
下面就給個範例設定那幾行的內容:
secret:
  enabled: true
  create: true
  filename: cloud.conf
  name: cinder-csi-cloud-config
  data:
    cloud.conf: |-
      [Global]
      auth-url="" # OpenStack Auth URL
      application-credential-id="" # Credential ID
      application-credential-secret="" # Credential Secret
      region=RegionOne
安裝 openstack-cinder-csi#
建立完成後,就安裝進去吧,官方文件是建議安裝在 kube-system 的 Namespace 裡面,那這裡就照這方向進行:
helm install --namespace kube-system cinder-csi cpo/openstack-cinder-csi -f values.yaml
安裝成功就會說使用 StorageClass 這兩個 csi-cinder-sc-retain 跟 csi-cinder-sc-delete 這就可以使用 PV。
這裡就可以建立 PVC:
# 1. Save as `example-pvc.yaml`
# 2. In bash, `kubectl apply -f example-pvc.yaml`
# 3. If you want to remove, `kubectl delete -f example-pvc.yaml`
apiVersion: v1
kind: PersistentVolumeClaim
metadata:
  name: csi-pvc-cinderplugin
spec:
  accessModes:
  - ReadWriteOnce
  resources:
    requests:
      storage: 1Gi
  storageClassName: csi-cinder-sc-delete
---
apiVersion: v1
kind: Pod
metadata:
  name: nginx
spec:
  containers:
  - image: nginx
    imagePullPolicy: IfNotPresent
    name: nginx
    ports:
    - containerPort: 80
      protocol: TCP
    volumeMounts:
      - mountPath: /var/lib/www/html
        name: csi-data-cinderplugin
  volumes:
  - name: csi-data-cinderplugin
    persistentVolumeClaim:
      claimName: csi-pvc-cinderplugin
      readOnly: false
用 apply 套用設定:
kubectl apply -f example-pvc.yaml稍等再檢查一下 PV 跟 PVC,就會發現他們已經 Bound 了
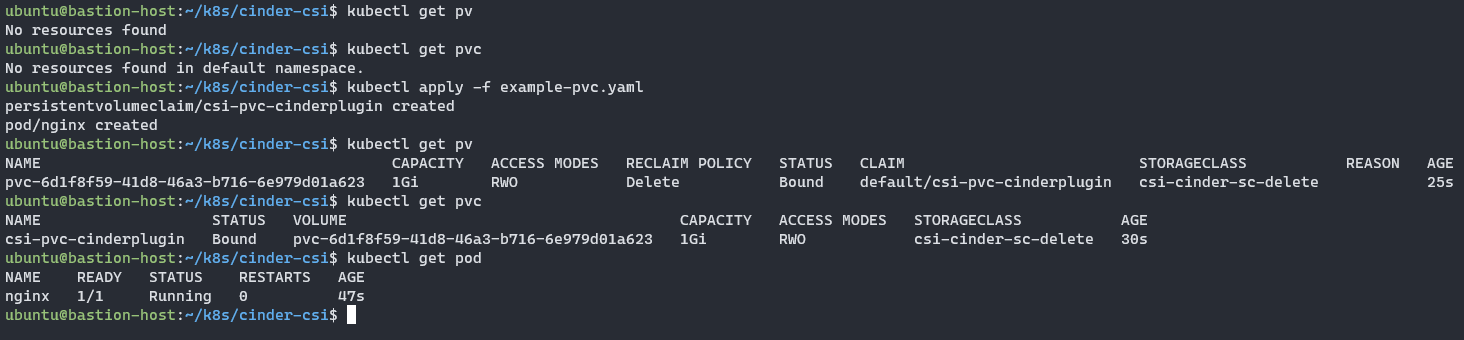
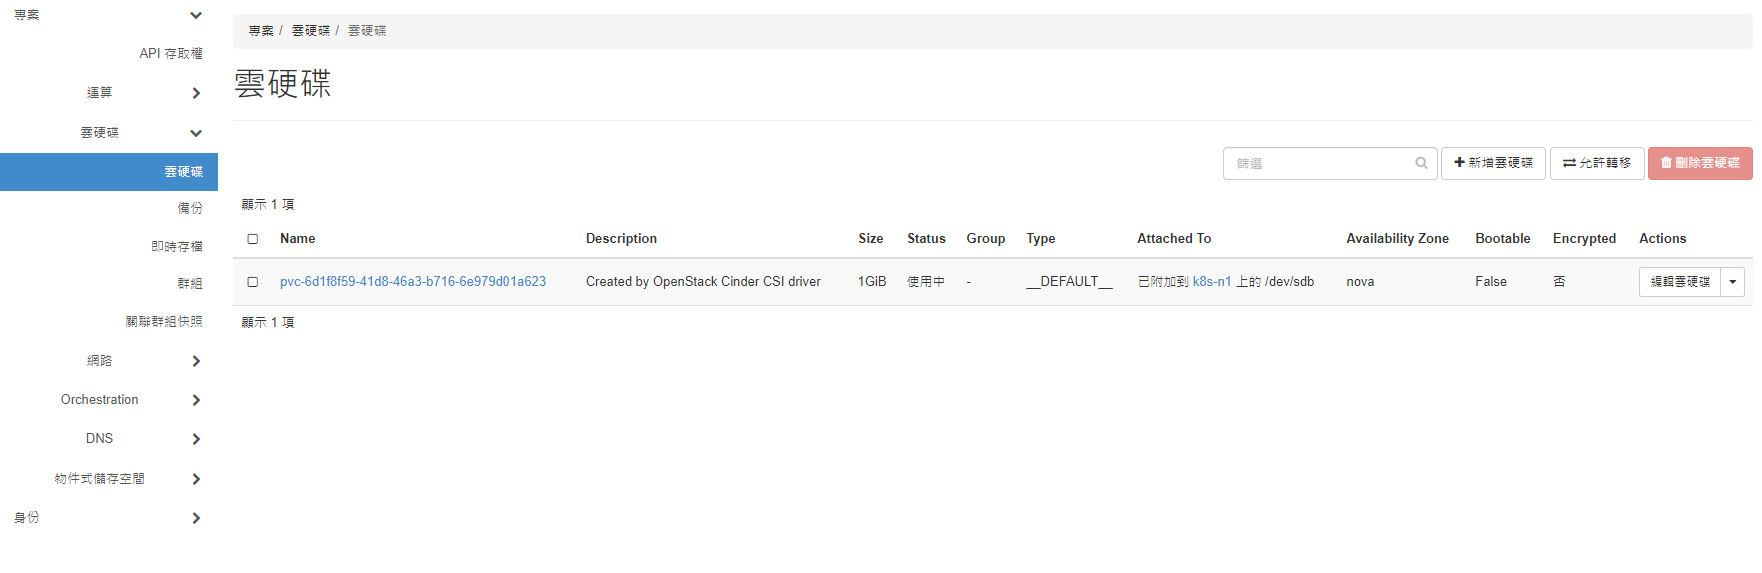
OpenStack 雲硬碟上也會有掛載硬碟到 VM 上
接下來就刪除它:
kubectl delete -f example-pvc.yaml刪除後沒隔多久 PV 就會消失了,那是因為 StorageClass 選了 csi-cinder-sc-delete,遇到 PVC 被刪除,PV 就會跟著移除。

那重要資料需要保留怎麼辦?其實就只要把 StorageClass 改為 csi-cinder-sc-retain,遇到 PVC 被刪除,PV 也不會跟著被刪除。
奇怪的 Liveness 判斷#
cinder-csi-plugin 雖然最後有時測上去有成功,但是 liveness 一直自己回應 HTTP 500,還會斷線,但 PVC 這樣測試下來目前都沒有碰到問題,甚至我也用 Service 測試連線了,也都是回傳 OK,沒有跳出錯誤。

基本儲存也具備,那我們就可以來建立監控服務了!
本系列內容也會同步貼到我的 iT 邦幫忙 https://ithelp.ithome.com.tw/users/20112934 歡迎來點一下追蹤,那我們就下一篇文章見啦!